
The Q50 uses LEDs for:
- Low Beams
- High Beams - Believe it or not - it's just 1 LED
- Day Time Running Lights
- Fog Lights
- Front Blinkers
- Side Markers
- Side Turn Signal in Mirrors
- Brake Lights
- High Mounted Brake Light
- Backup Light
- Front Passenger Map Lights
- Outside Handle Light
- Trunk Light - Type - 3.4W single
- License Plate Light - Type W5W - 5W each
- Rear Passenger Reading Lights - 8W each
- Front Door Puddle Lights - 5W each
- Glove Box Light - 2W single
- Vanity Mirror Light - 1.8W each
- Rear Blinker Lights - WY21W - 21W each
Why, oh why could you not have gone all the way with LEDs, Infiniti?
Not to worry at least you gave me something to do.
My rules and reasons for changing to LED bulbs:
- I like the clean white color (4500K) as opposed to the yellowish (3400K) of halogen bulbs. If some people like cool blue (6500K) LEDs, then more power to them, but I hate those.
- Reduce the power consumption & heat output considerably. Cool to the touch - I already burnt my finger tips trying to remove the rear reading lights. Also, has your kid ever left a dome light on at the airport parking ramp, and you come back to a flat battery. It doesn't happen with LEDs.
- Consistent look with the rest of the LED lights already in the Q50.
- Any upgrade to the existing lights with LEDs must result in better lighting, not less, not equal, but better, but not too much, otherwise it is not worth upgrading to LEDs. Therefore, it is important to carefully select the proper bulb for each application.
- Must not interfere with working of the system e.g. fast blinking. For this reason, I will not be changing the bulb for the rear turn signal. I do not want to swap out the relay or mess with splicing in load resistors. Recall that the Q50's Blind Spot warning system relays on the turn signal status if one was to mess with the voltage in that system, then it could have dire consequences.
Choosing and Ordering Replacement Bulbs:
I have used other sites in the past, however they have stopped carrying the pure white LEDs (4500-5500K) in favor for what they call cool white (7100K), and these are too blue for my liking. Also their prices have gone up considerably. Therefore I have reverted to suppliers on eBay with pure white LEDs that are SMD-based, 10,000+ good seller rating, very competitive pricing, and free shipping. So far eBay sellers have has been great for this, I look for each bulb separately and usually buy 1 extra bulb so I have a replacement in case years later one burns out and I cannot get the same color.
 |
| My Army of LEDs |
Below all Option are from eBay Stores, I had a handful of various LED's laying around, so all I needed to order was vanity mirror LEDs, which I did over eBay. If I were buying all the LEDs again, I'd buy a US-based eBay seller. I would look for LEDs based on "SMD 5050", which is a type of LED and is what I have recommended below.
Trunk Light:
Search for a "1W T10 LED White".
In my opinion, this stock is too dim at 3.4W. My suggested replacements are
in Color White 5500K from eBay Store of member vision-technology.
Rear Passenger Reading Lamps/License Plate/Front Door Puddle Lights:
Search for a "5 SMD 5050 T10 LED White".
I recommend using Option 2.
You need to get 3 pairs or 6 total for the rear passenger lamps, door puddle lamps, and license plate.
Glove Box:
Search for a "Type 74 Dashboard LED White"
I recommend (again not white any longer) or Option 2
I know option 2 comes with 2 bulbs, but what the heck.
Vanity Light:
Search for "Vanity Festoon 29mm LED"
I recommend the ones I just ordered Option 2.
Option 2 had twice as many, but I need them for another car and it does come with 3 SMD LEDs, the ladies will appreciate this much light from a vanity :-)
This is a pretty low budget upgrade. In the past, I have usually spent $200-$300 on LEDs. So now you will wait a few days for the LEDs to arrive. Once that happens, here are simple install instructions, should not take more than 1 hour, most of that being the glove box section and rear license plate lights.
Front Door Puddle Lights:
Using a flat screw driver, pop the entire assembly from the door. It is attached by 2 clips. Once the entire assembly is removed, using a small flat screw driver pop the clear lens from the white housing. There are 4 plastic tabs holding the lens to the assembly. Once the lens is off, remove the bulb. It will be hot, very hot, use a cloth. I had to use a screwdriver to pop the bulb out. Install the 5 SMD LEDs. If it doesn't light up, reverse the LED 180 degrees. Pop the lens back on and pop the assembly into the door. Repeat for the other side.
 |
| Remove Assembly (LED already installed) |
 |
| Remove 4 tabs to release lens cover |
 |
| Before |
 |
| After |
Rear Passenger Reading Lights:
Using a thin flat screw driver pop the white lens cover off the assembly from the rear part of the light. It will bend slightly and pop out. Pull the hot bulb out, put in the LED and put the cover back in the only direction it will go. Repeat for the other side.
 |
| Pop Out Lens (LED already installed) |
 |
| Before |
 |
| After |
Trunk Light:
To install remove the plastic dome cap by unhooking it from the tab in the back. Remove the existing bulb, it will be hot. Put in the LED. If it doesn't light up insert the LED the other way around. Option 1 is snug and requires a little pressure to put back the cap and option 2 LEDs from above should be easier to close the cap.
 |
| Removal (LED already installed) |
 |
| Before |
 |
| After LED |
 |
| Trunk Light Before |
 |
| Trunk Light After |
Glove Box Light:
Remove the side finisher panel on the right side of the glove box, 3 tabs secure that.
 |
| Side Finisher |
Open the Glove Box and pull it up, this should remove the whole glove box from its hinges underneath. Twist the glove box out of its stops.
Remove the little spring cord attachment from the glove box. The whole glove box should come out now completely.
 |
| Pull Up |
 |
| Remove tab from Glove Box |
Pop the bottom panel down and it hang there. it is connected with 3 tabs.
 |
| Pop it Down |
Remove the 8 phillips screws that hold the finisher section. Pull that section out. The glove box light is attached to the top of it.
 |
| Remove Phillips screw |
Remove the black bulb holder by twisting it, remove the bulb.
 Install the LED bulb. Turn the parking lights on. The glove box light should come on. If not then reverse the LED. The glove box light comes on only when the headlights are on. Turn of lights.

 |
| LED Installed |
Reinstall the glove box lamp holder and twist.
Reinstall the the entire finisher section and 8 screws
Pop the bottom finisher back in place
Replace the Glove Box and re-attach the spring cord. Pop the Glove box back into its hinges. Close it.
Replace the side finished.
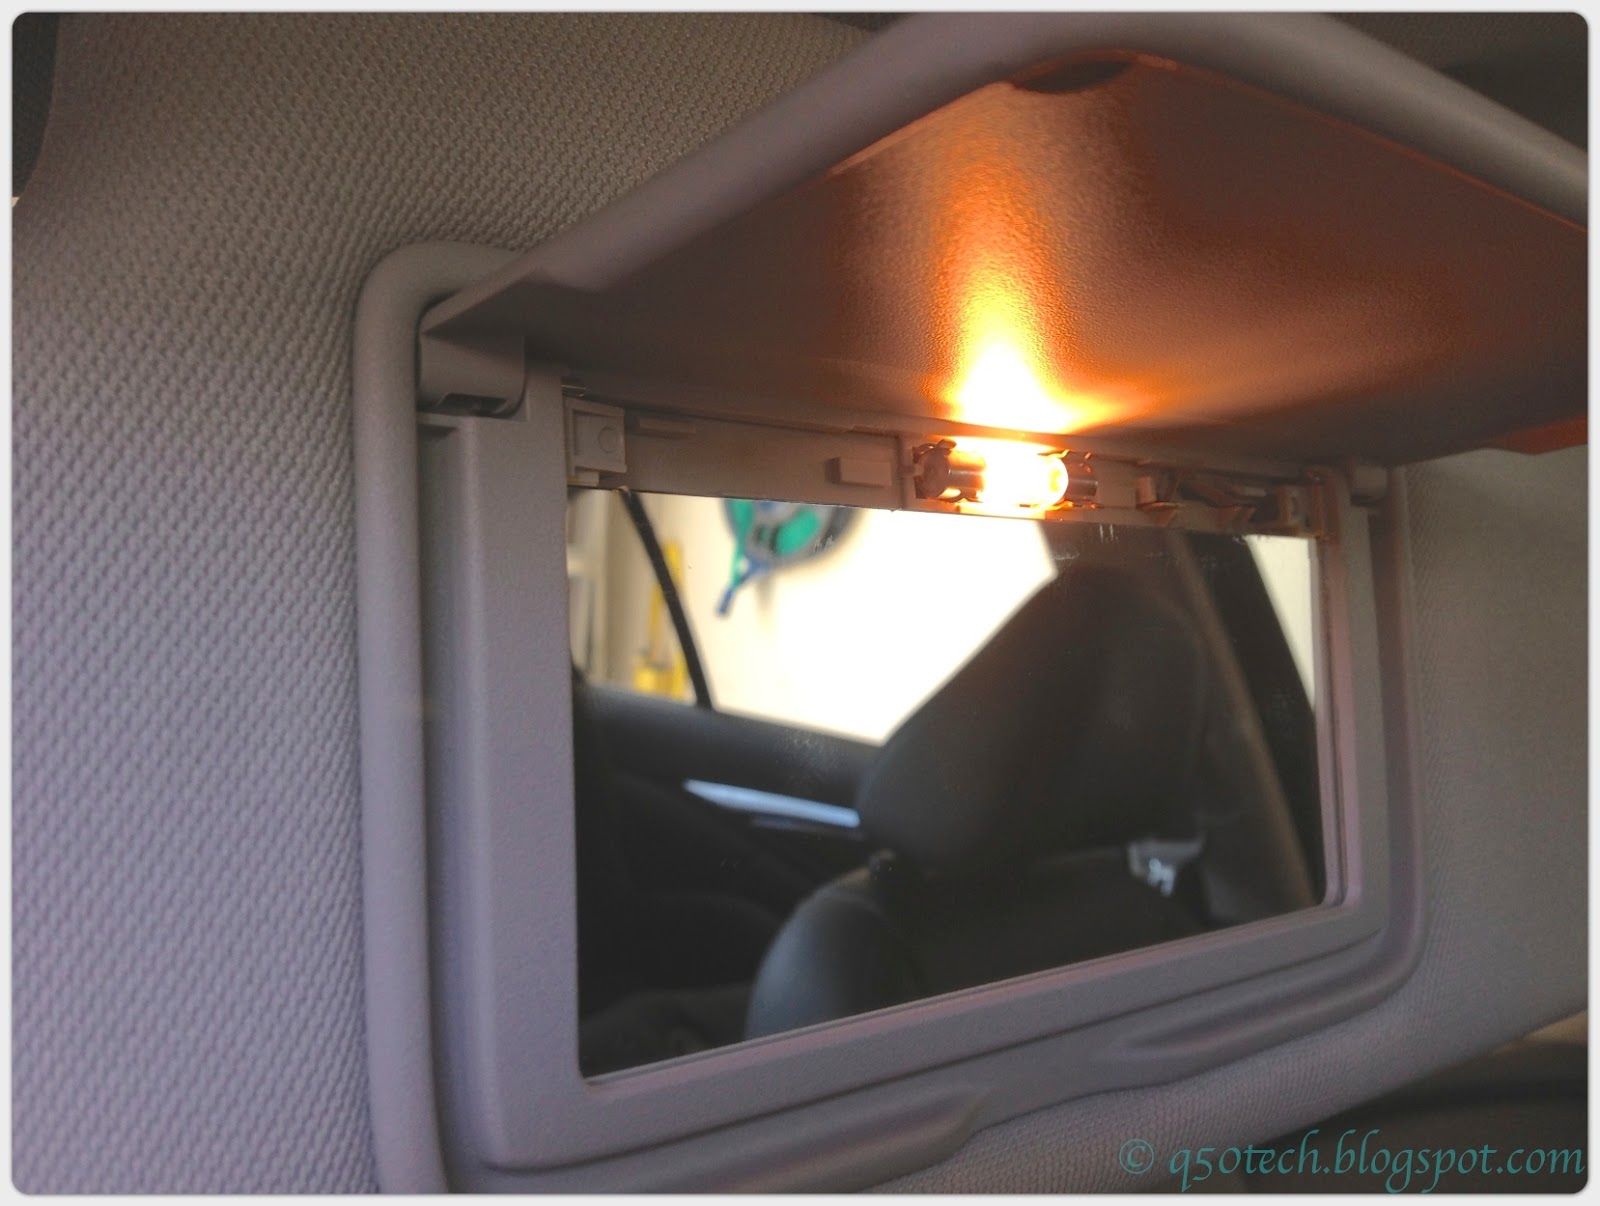
Vanity Mirror Lights:
Open the vanity mirror. Using a small flat screw driver, pop the white plastic cover off the mirror. Start at the right side of the cover and slow work to the left popping an inch at a time. Be sure not to crack the glass or plastic. Once the cover is off remove the fuse like light and replace with LED. Pop the cover back on bit by bit. I have not installed these yet, but removed it to measure the size of the bulbs to order the correct one.
 |
| Before |
 |
| Vanity cover removed. |
 |
| LEDs Installed. |
License Plate Lights:
I did this the hard way. I did not want to pop the light with the risk that it might break the entire panel. Not knowing how it was fitted into the panel. Removed the trunk finisher, removed the harnesses, unscrewed the bolts and holding the INFINITI silver finisher, then got to the lights.
You DO NOT have to do this. I already did it the hard way, so here is the easy way:
Long behold, I could have just popped them out as follows.
Put a flat screwdriver on the right side of each lamp. Pop it up slightly, it will not come out yet.
 |
| Trunk Lid Finisher Removed - DO NOT do this. |
Long behold, I could have just popped them out as follows.
Put a flat screwdriver on the right side of each lamp. Pop it up slightly, it will not come out yet.
 |
| Pop Out the Light one side at a time. |
 |
| Pop the the other side, and remove the entire light |
 |
| Remove the holder, on car, no removal |
 |
| LED installed. |
It really takes the Q50 up a class and frankly it should have come from the factory like this :)